Setting up your Easy Ads for Facebook account means simply connecting your Business Manager with the app and granting it access to your advertising assets.
- Unrestricted Facebook profile, ad account, page, and Pixel.
You don’t have all the requirements? Don’t worry!
-
If you’re new to Facebook marketing, click here for a complete guide to creating a Business Manager in under 30 minutes.
-
If one of your Business Manager elements is restricted, contact our support team here for expert advice on what to do next.
If you have all the requirements mentioned above, setting up your account on Easy Ads for Facebook is super easy. Let’s get started!
| Before getting started, make sure you have the Easy Ads for Facebook app open in a browser tab.
Steps:
-
Open a new tab in your browser.
-
Go to https://facebook.com
-
Log in to the Facebook profile with admin access to the ad account you want to use with Easy Ads for Facebook.
-
Return to the browser tab where you have the Easy Ads for Facebook app open.
-
Click on the Connect Facebook button.
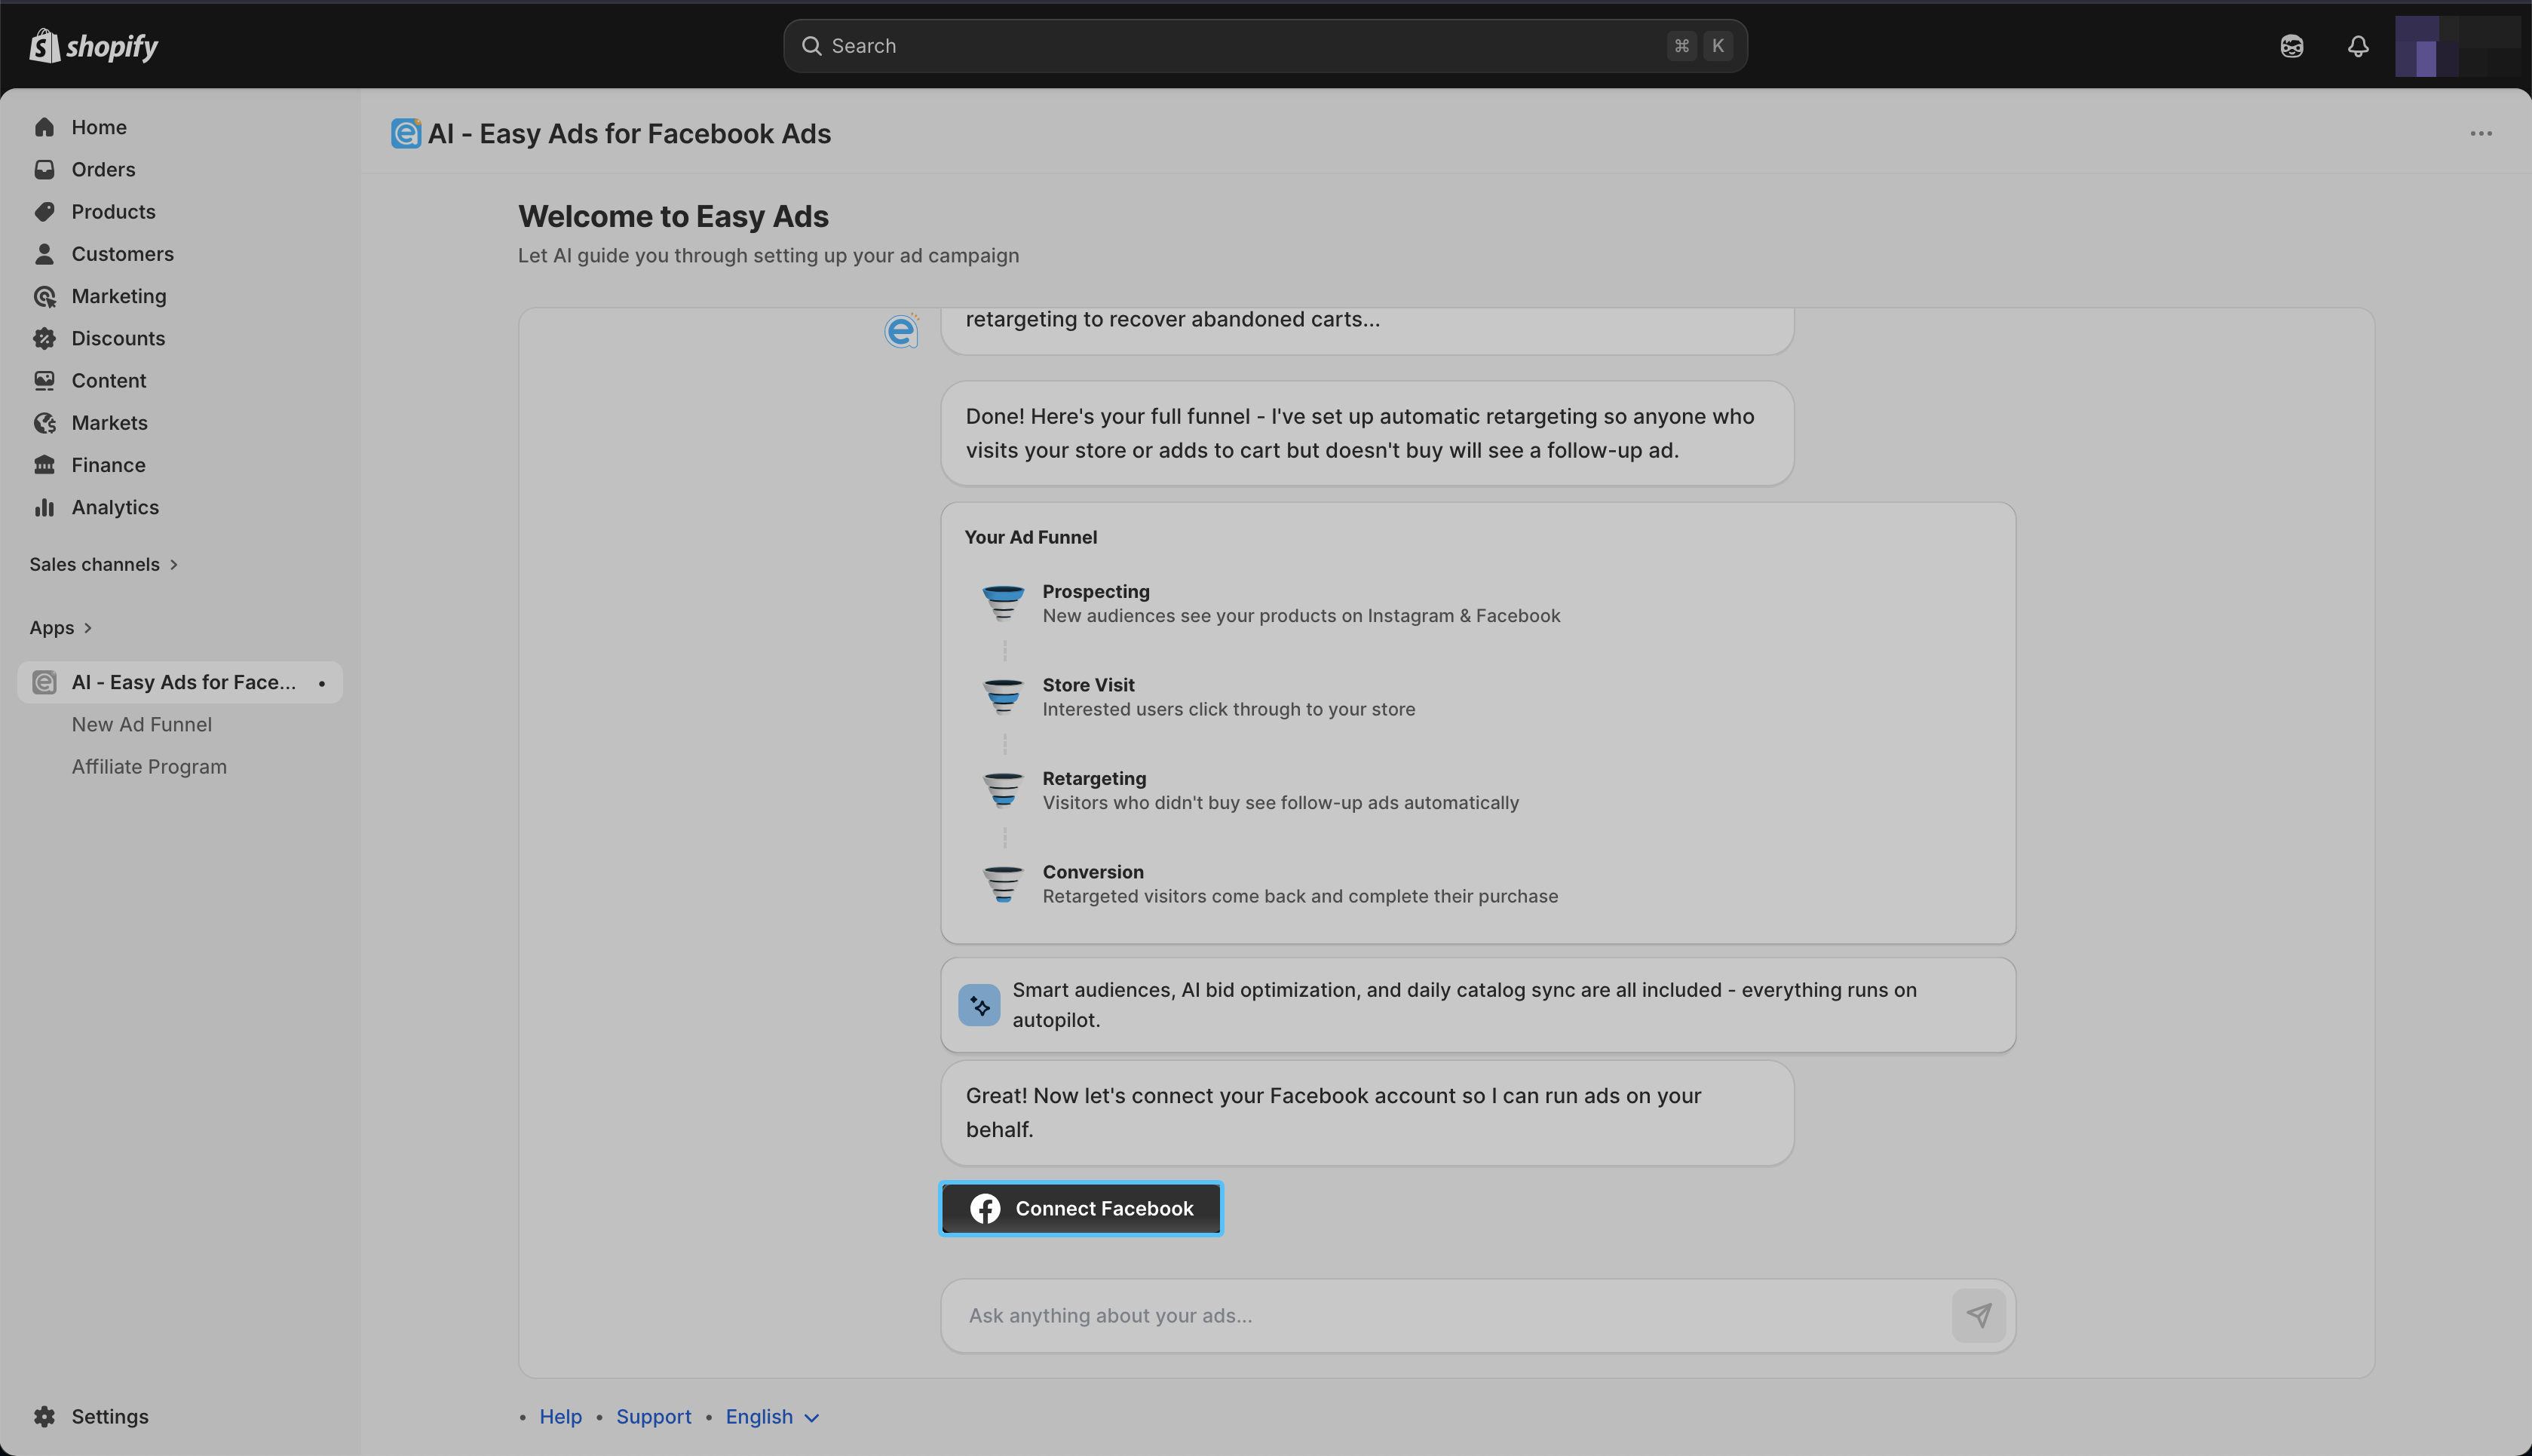
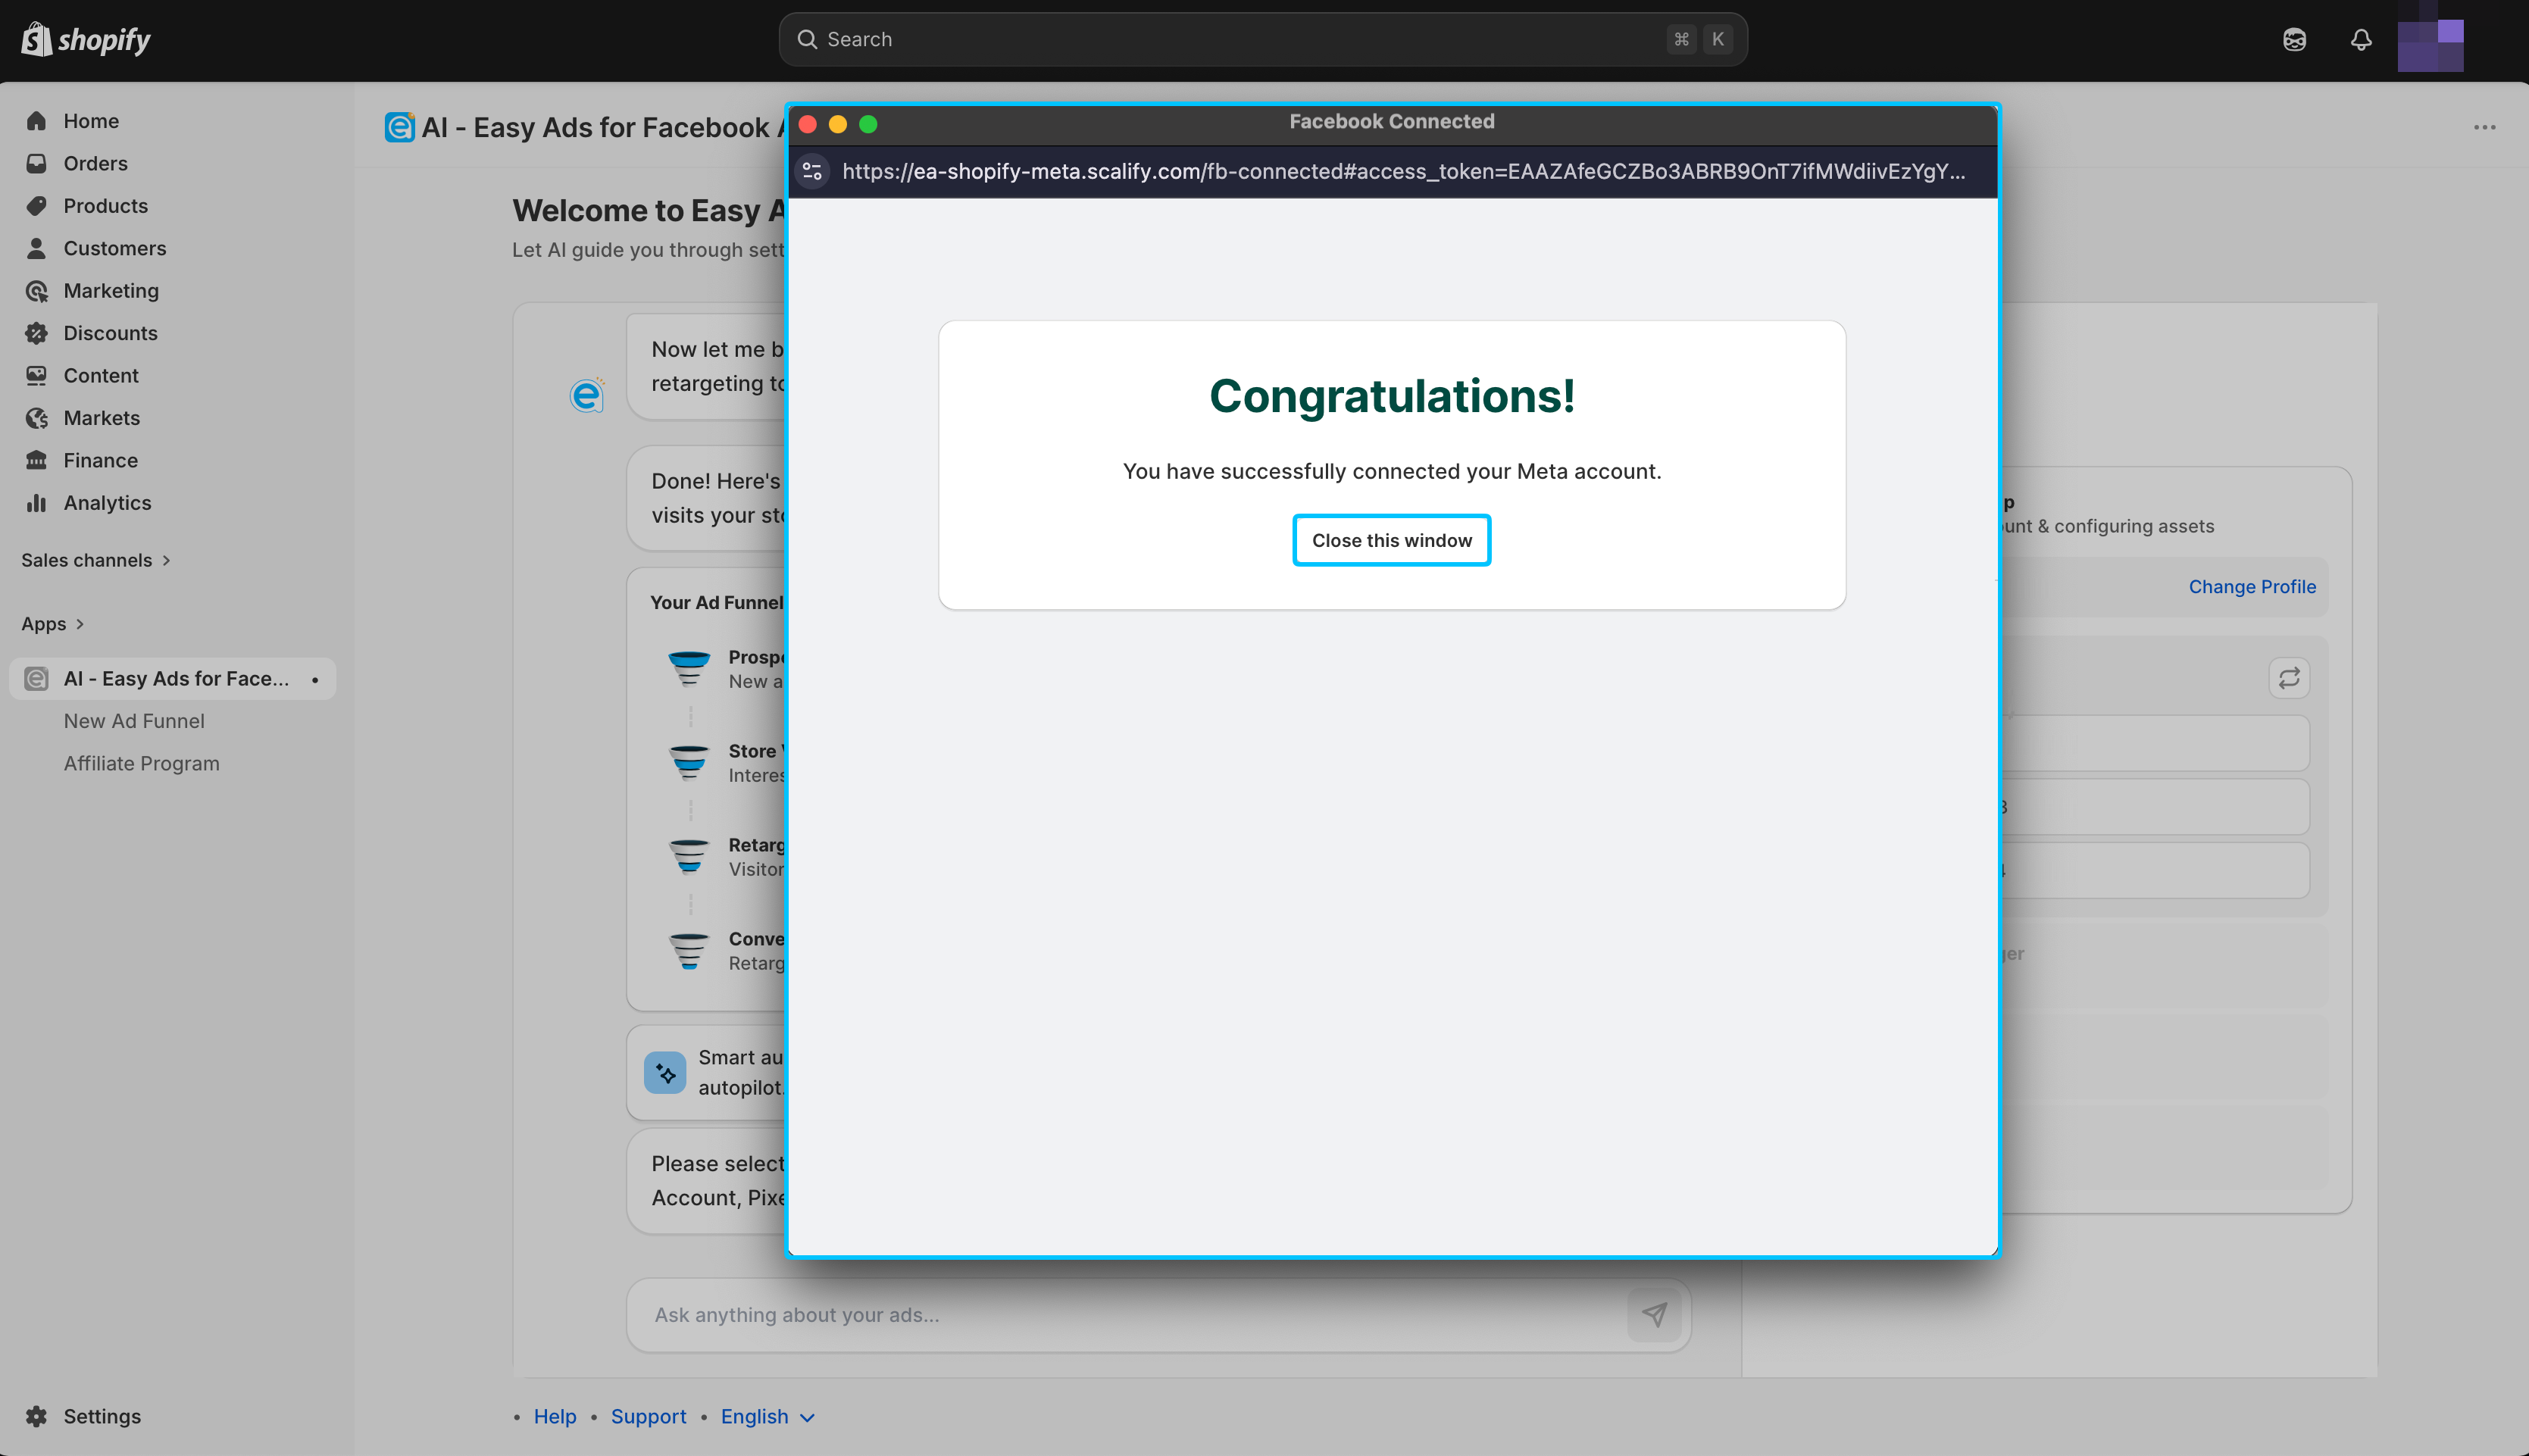
A new pop-up window will open. Authorize access by clicking Continue.
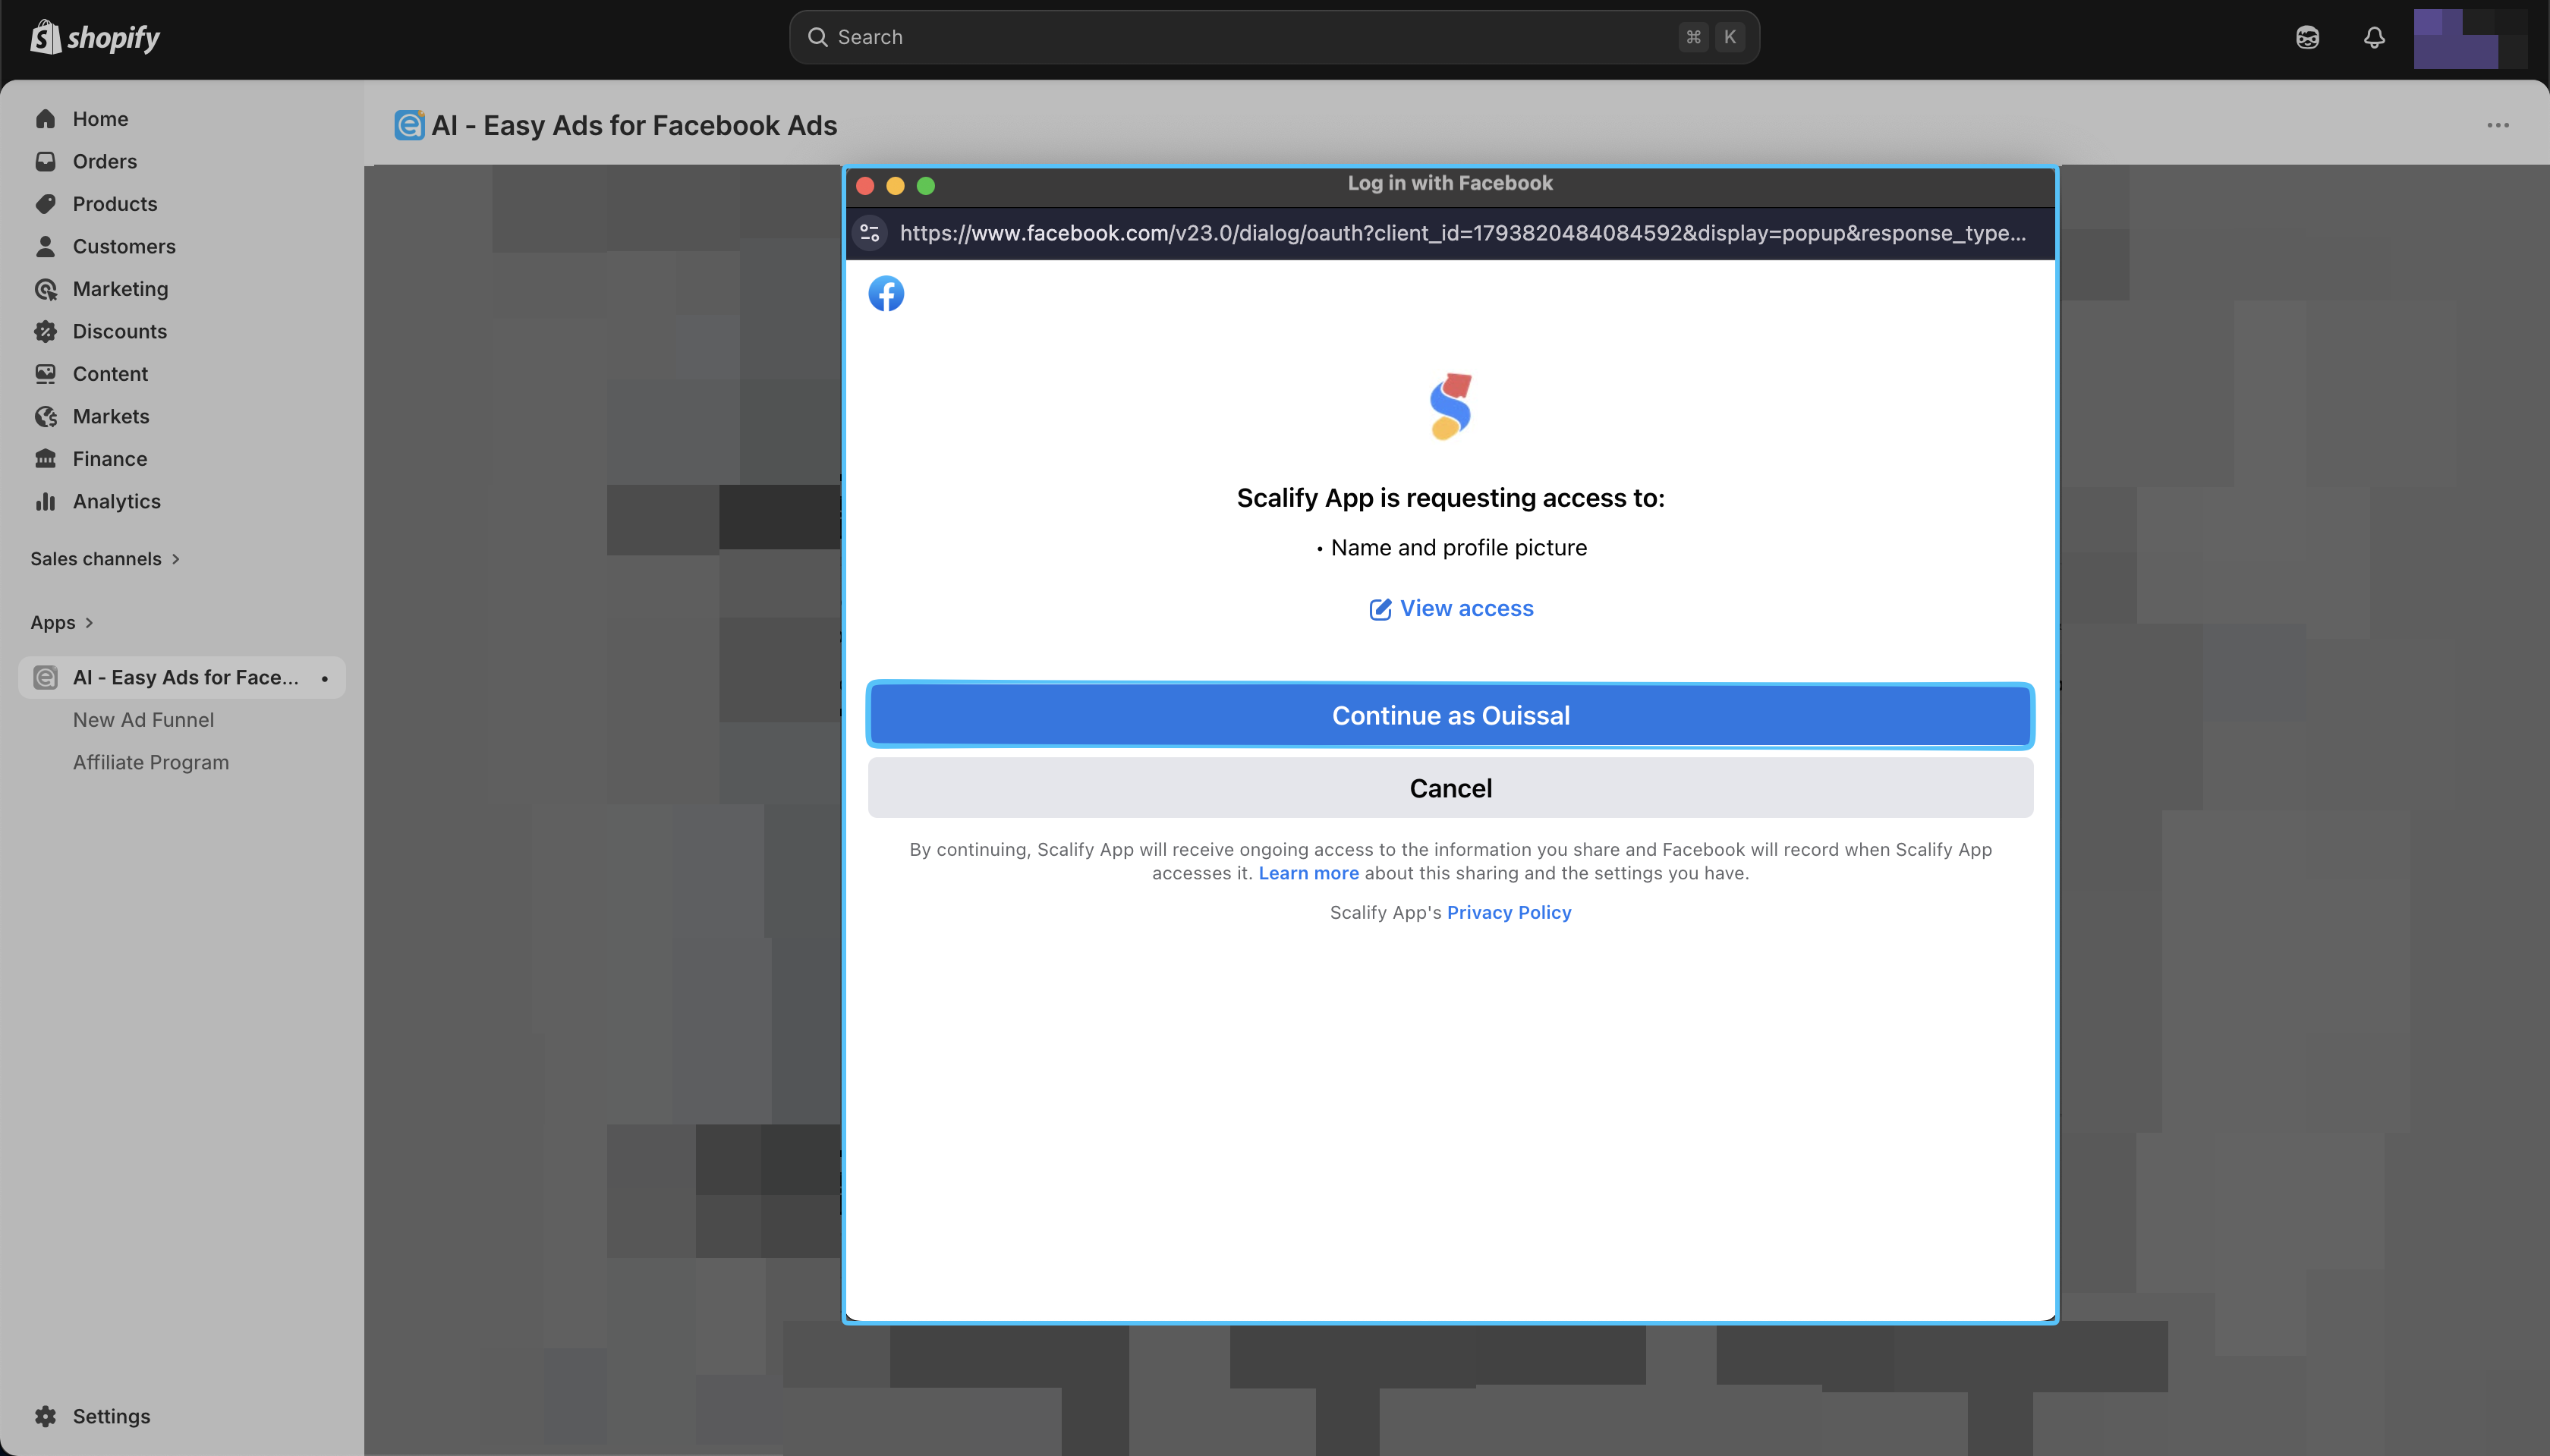
Click on the Close This Window button.
- In the Facebook Page dropdown, select the page you want like to advertise with.
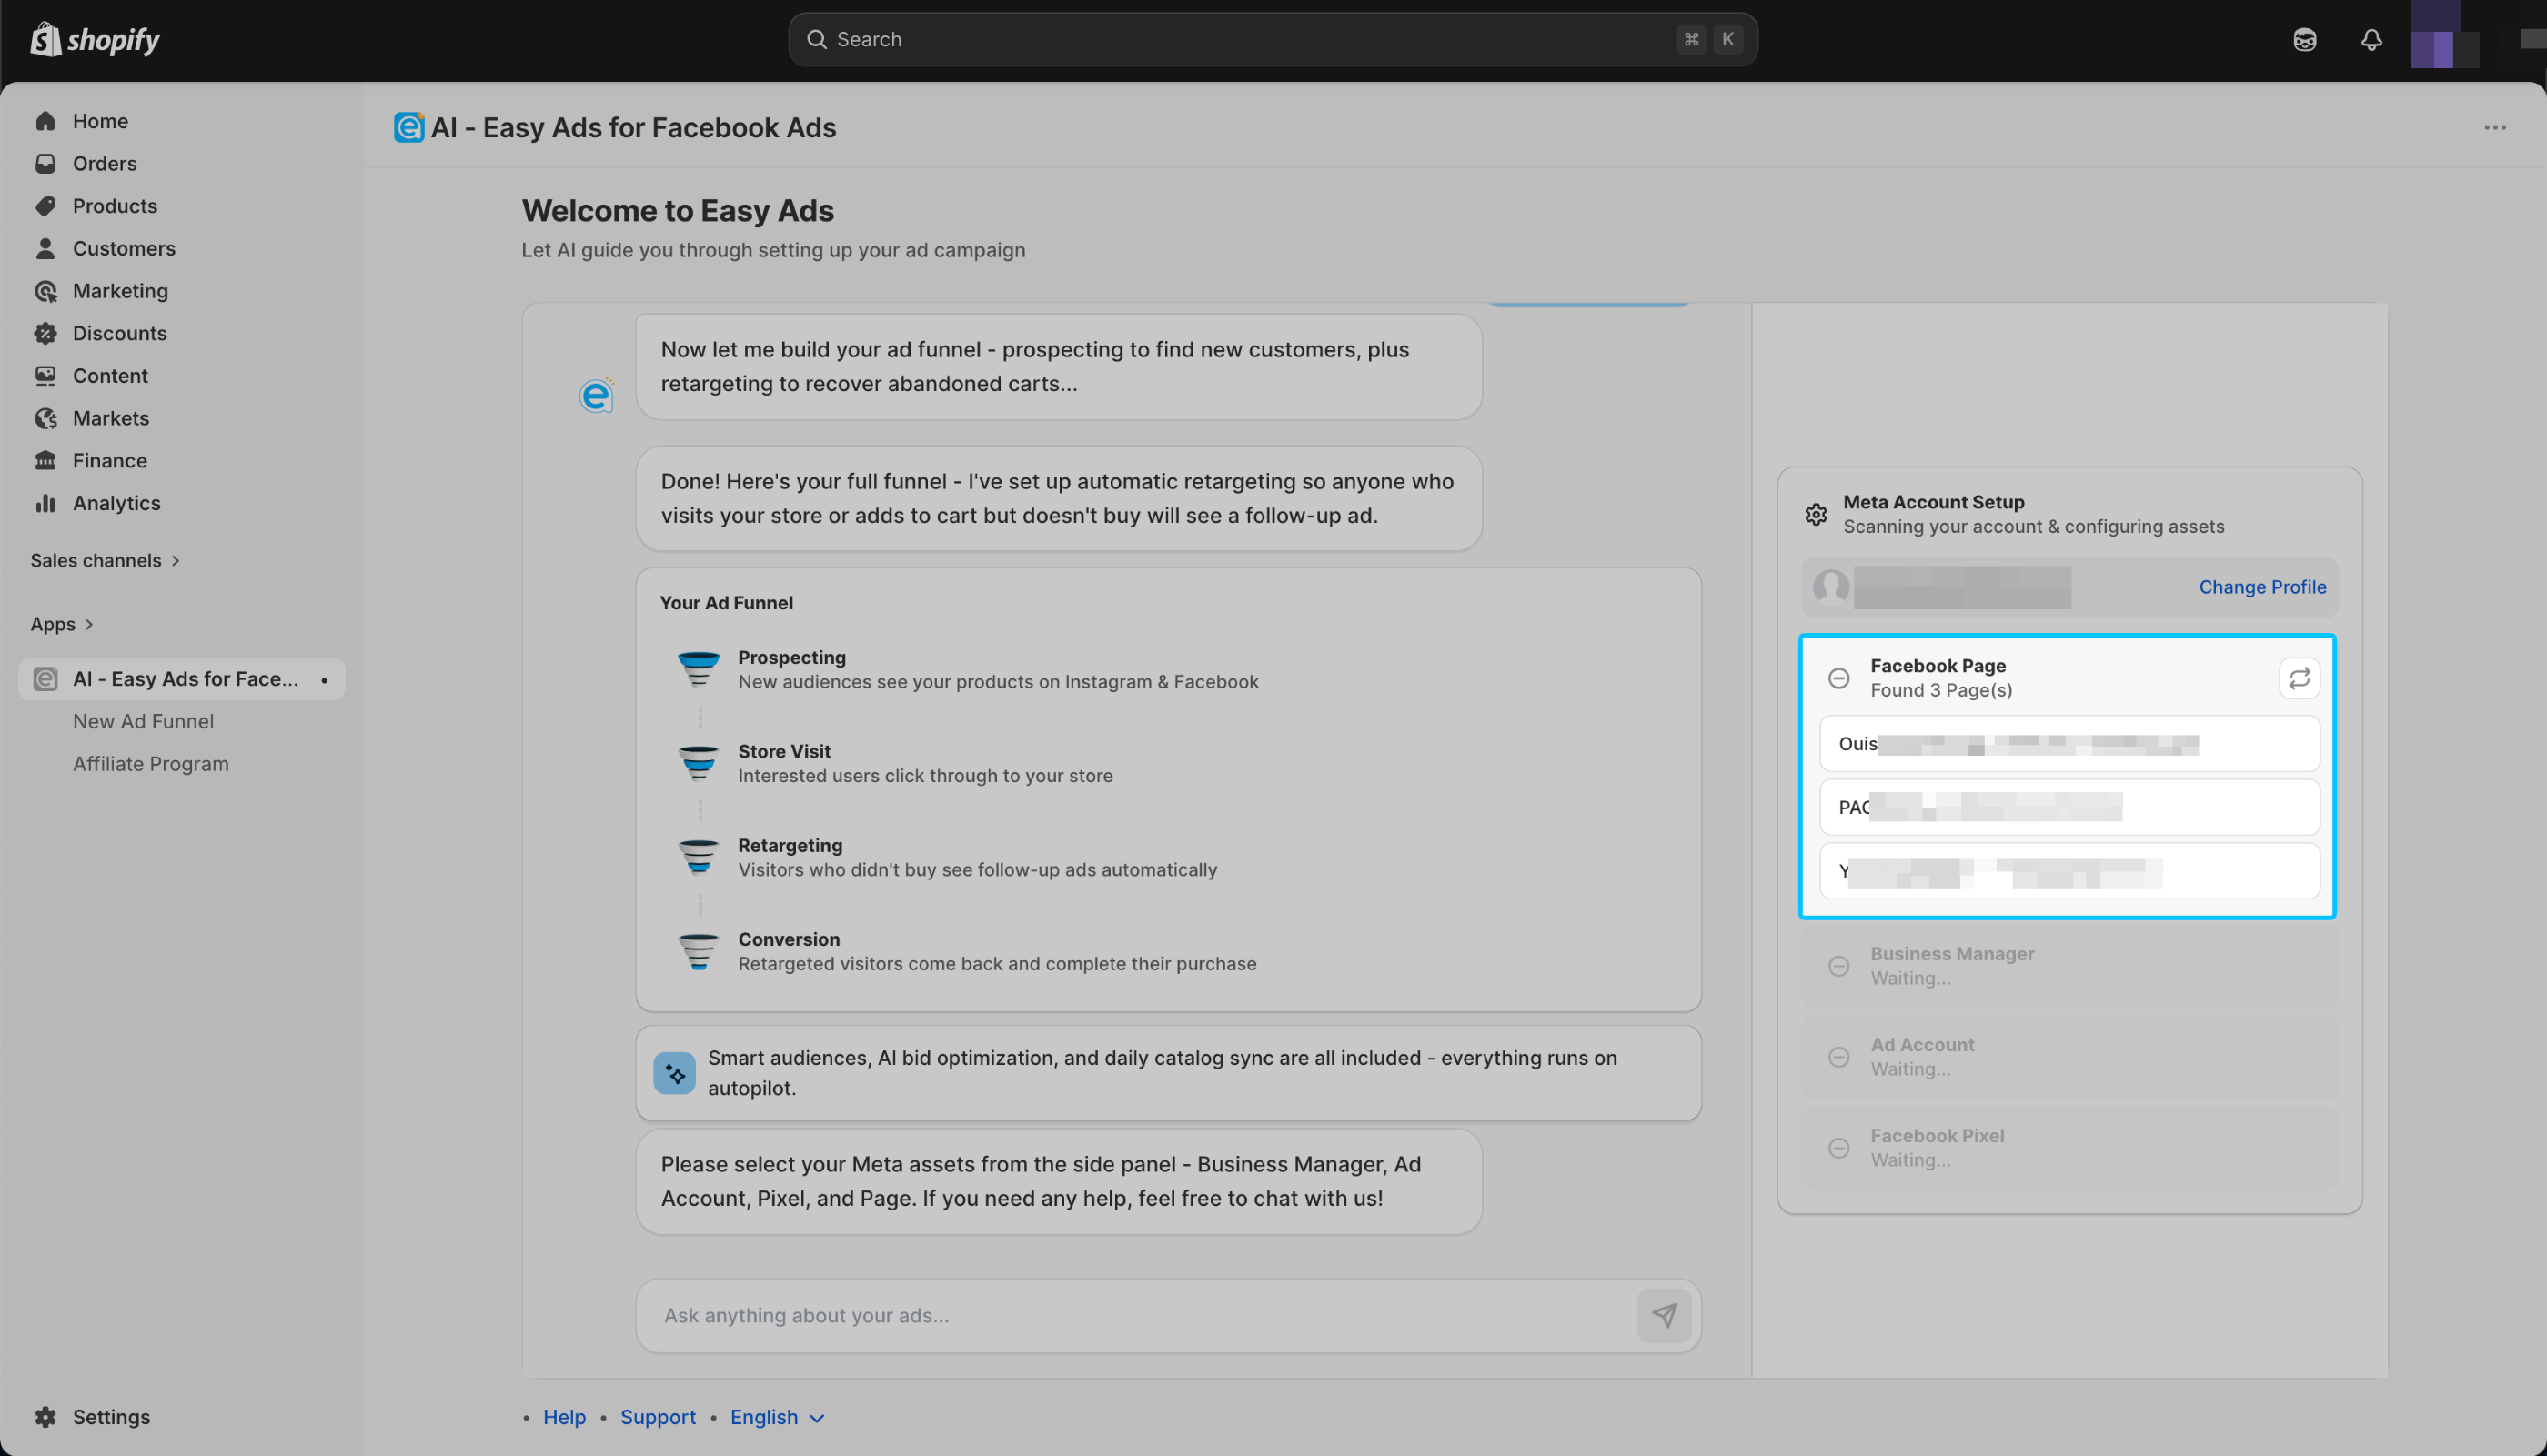
You can only use active pages to advertise with Easy Ads for Facebook Ads, you cannot used banned or restricted pages.
Easy Ads for Facebook will automatically select the Instagram Business account that is assigned with your Facebook page.
If you don't have an Instagram Business account, don't worry!
Here is a step by step guide that wil help you create yours: Complete Meta Business Manager Setup Guide
If you can't see the Facebook page you want to connect, here is how to fix that: I Can’t Select/Find My Facebook Page
- In the Business Manager dropdown, select the Business Manager you want to use.
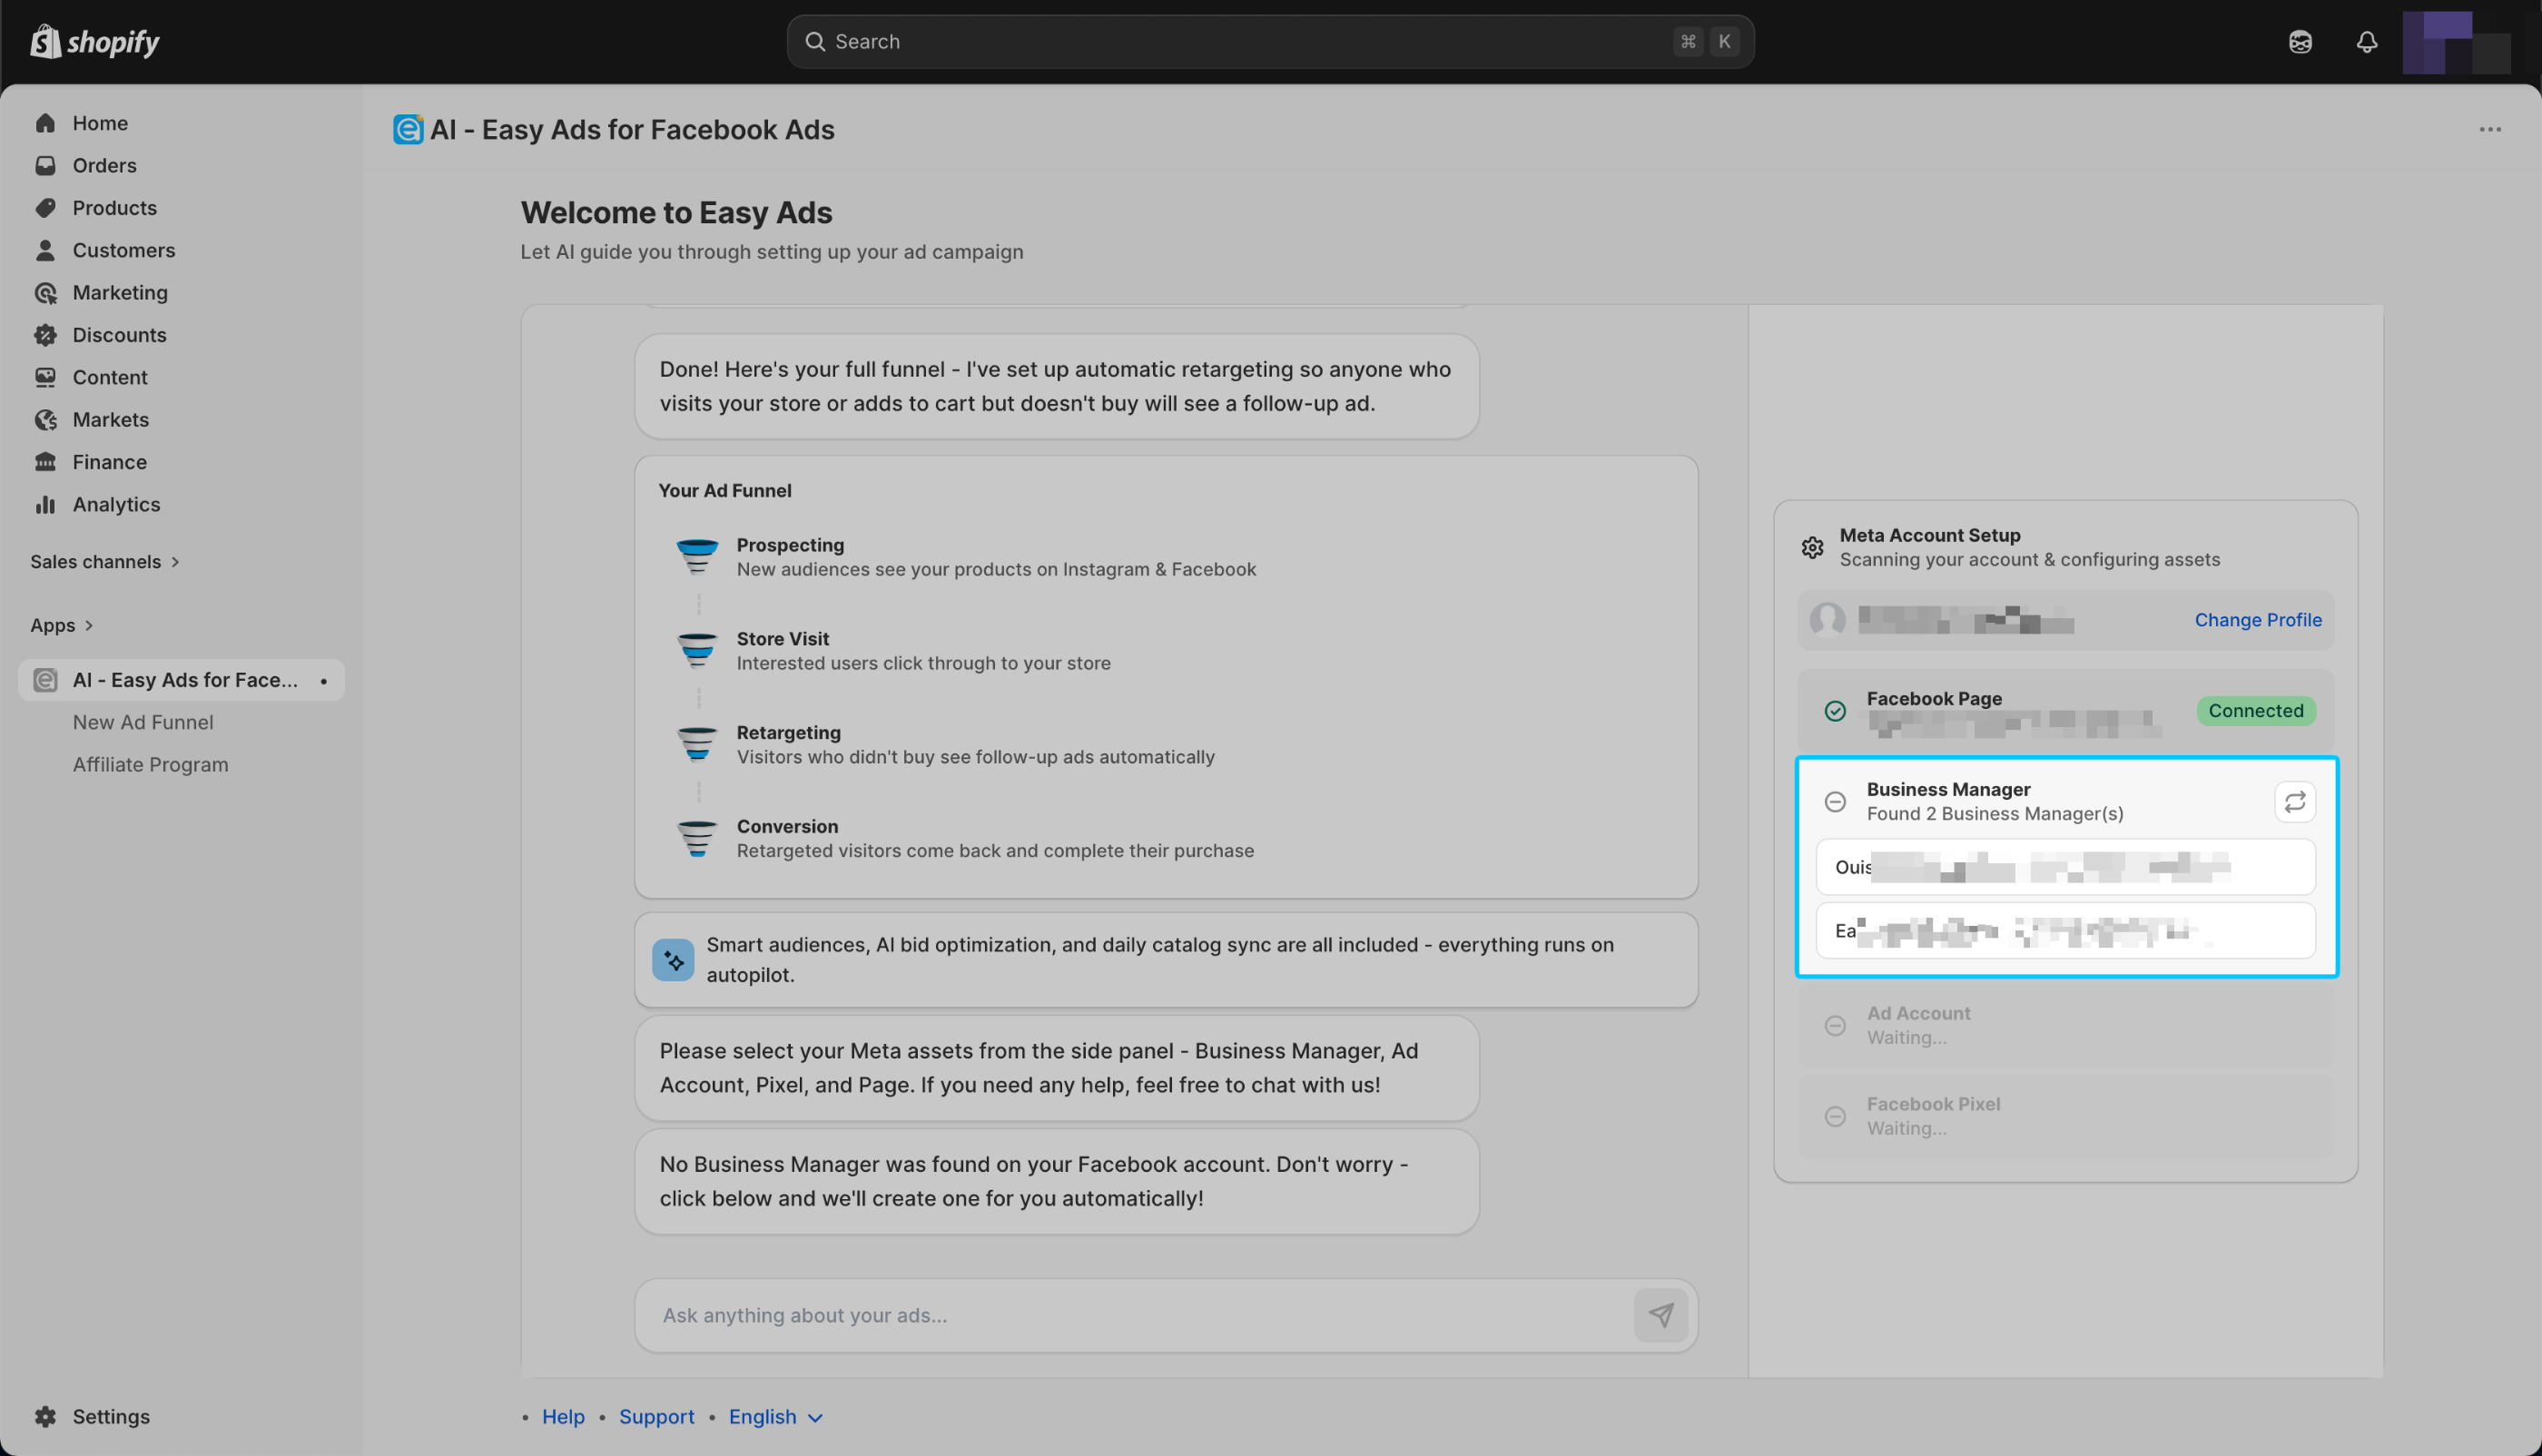
If you can't find your business manager in the Easy Ads dashboard, here is how to solve that: I Can’t Select/Find My Meta (Facebook) Business Manager
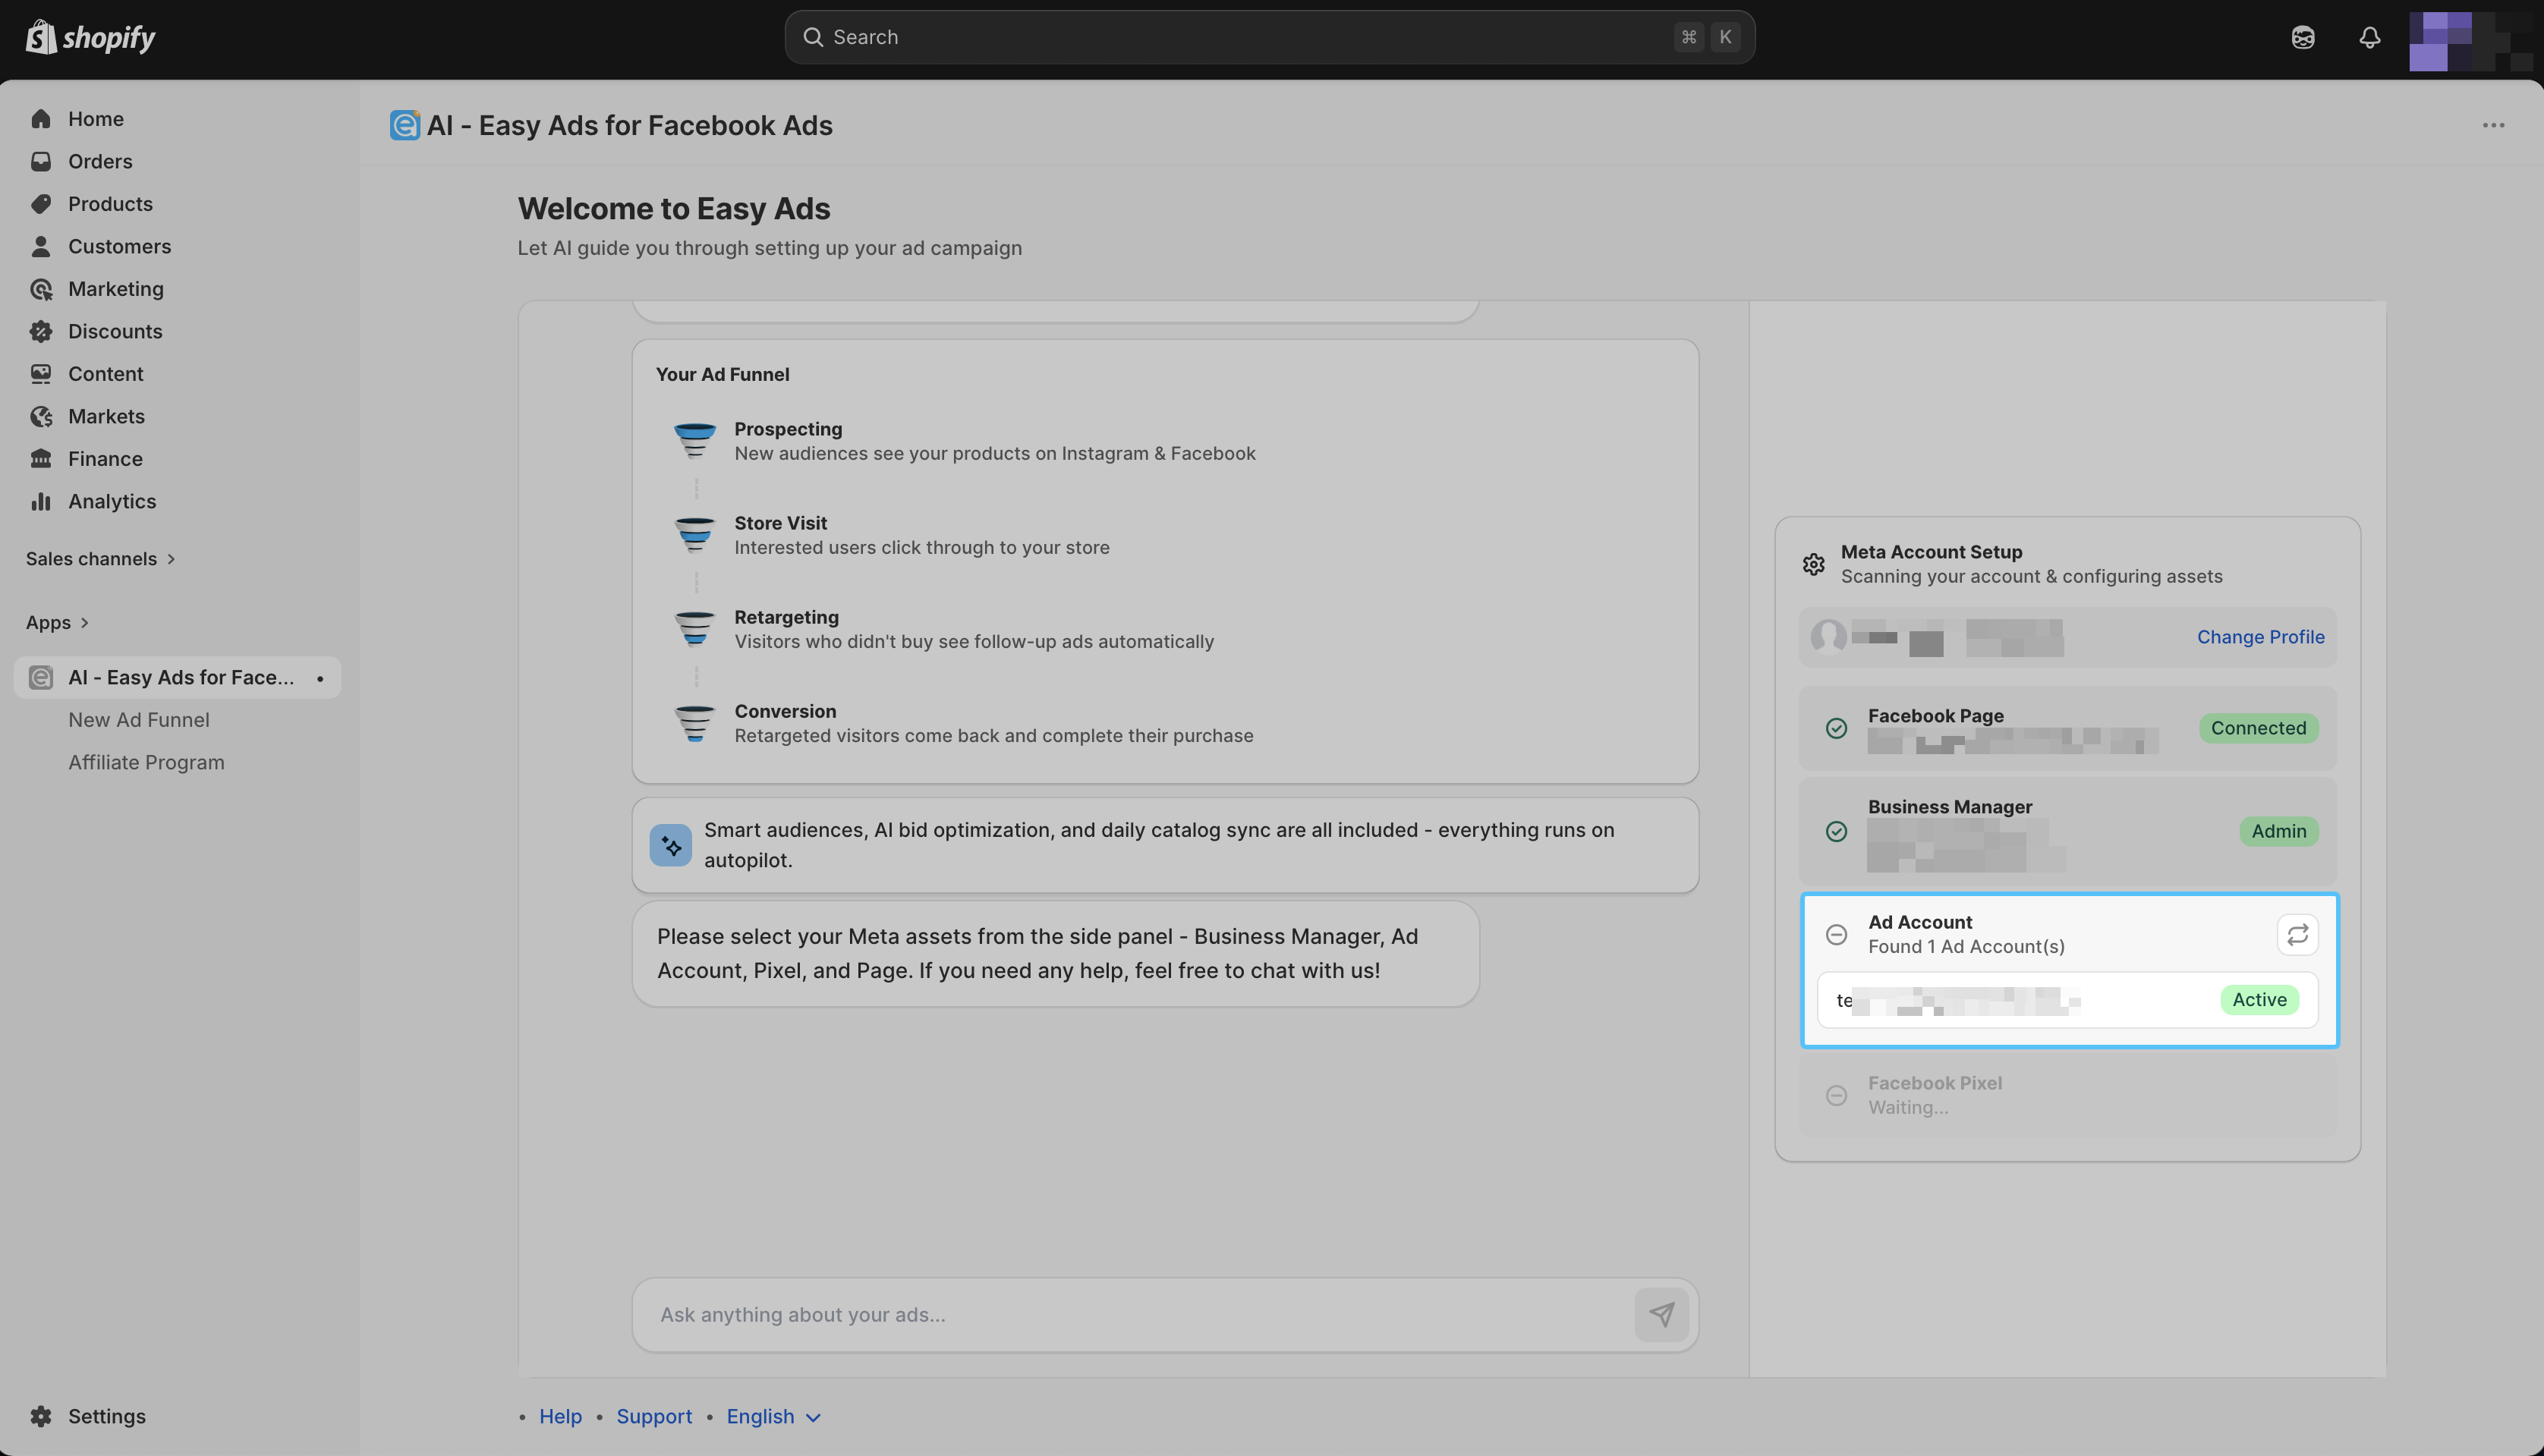
- In the Facebook Ad Account dropdown, select the ad account you want to use.
 \
\
You can only use active ad accounts to advertise with Easy Ads for Facebook Ads, you cannot used banned or restricted ad accounts.
If you can't find your ad account in Easy Ads, here is how to fix that: I Can’t Select/Find My Meta (Facebook) Ad Account
- In the Facebook Pixel dropdown, select the pixel you want to use.
Easy Ads for Facebook will automatically show only the Pixels that are (1) assigned with the ad account you selected in the previous step and (2) installed on your Shopify store.
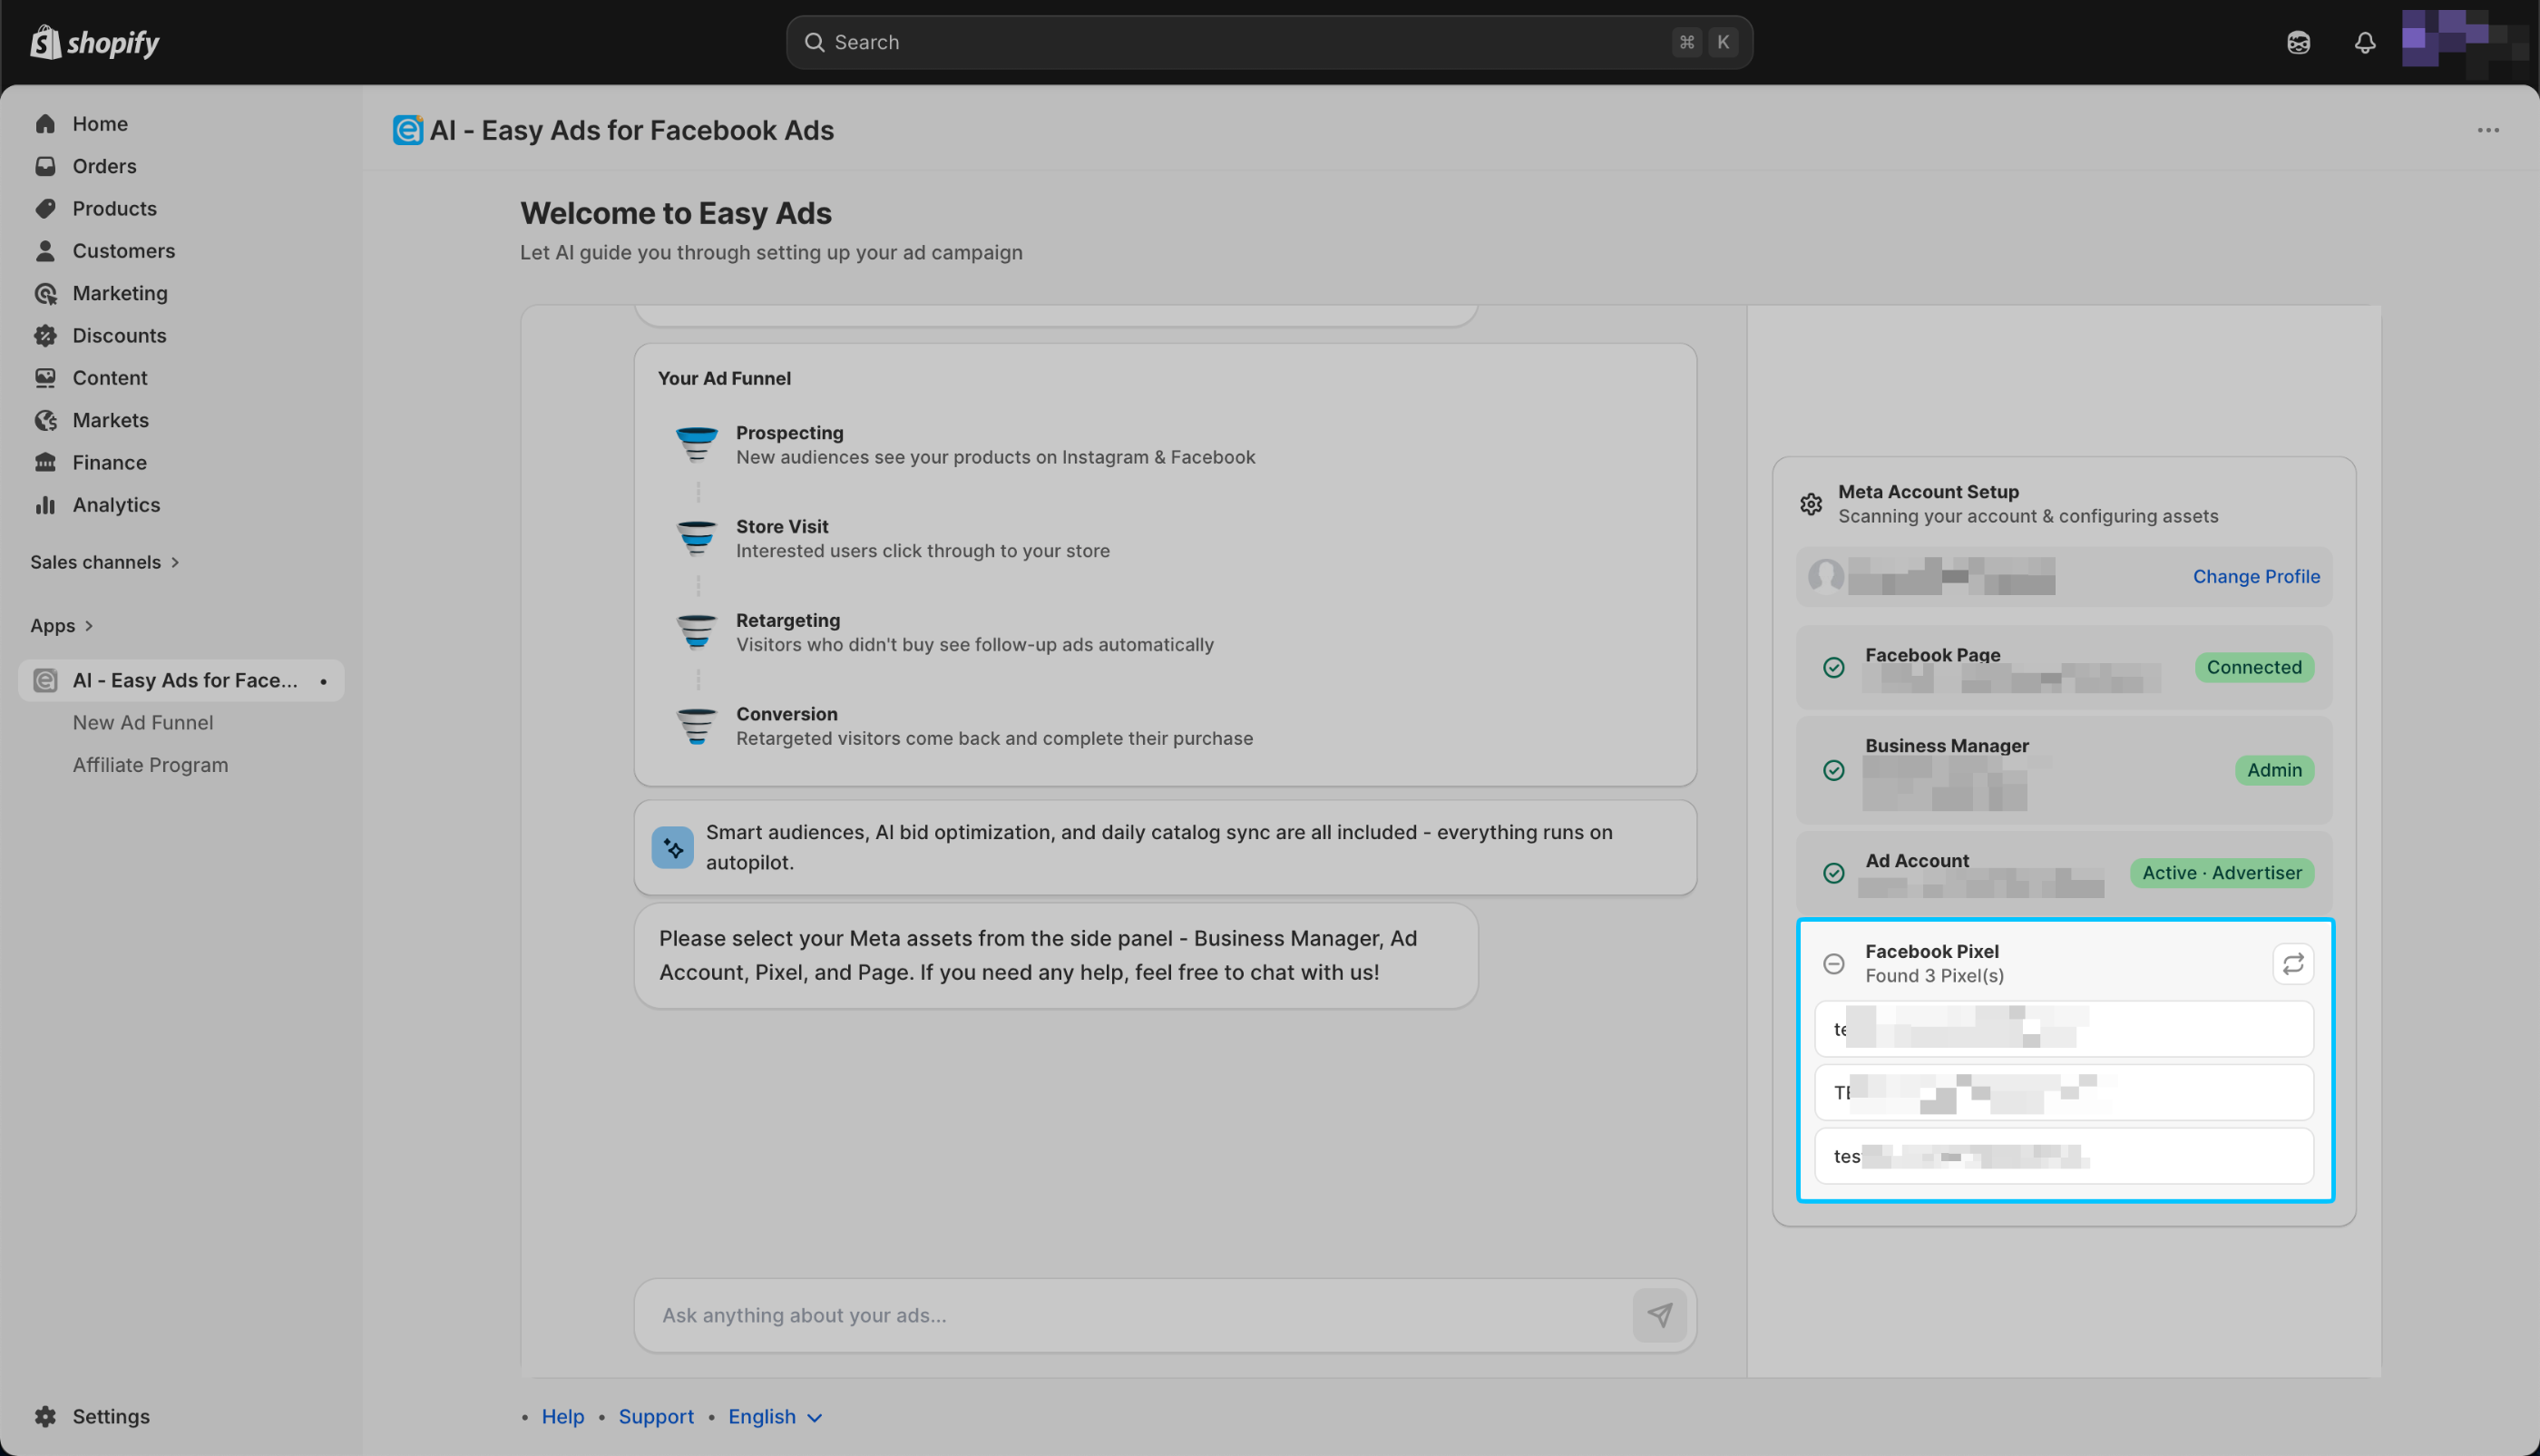
You can only use active Pixels to advertise with Easy Ads for Facebook Ads, you cannot used banned or restricted Pixels.
If you can't see your pixel, here is how to fix that: Why I Can’t Select/Find My Facebook Pixel (Dataset)?
If you're still struggeling with creating your ads in Easy Ads, please watch this guide: Facebook Ads Guide: How To Create A Facebook & Instagram Ads Funnel That Conve